apologies for some blurriness, my eyes are very dry because of the fibromyalgia or the meds, and the gel that helps the pain gives my eyes a mucky windscreen effect, so making sure the camera is focused is no fun at all! Thanks to Cherise for taking the clearer shots!
Machine cords are very easy to make and have dozens of uses. They’re a useful way to use up half bobbins of thread and scraps of yarn and to add a different texture to your collages or fibre sculptures. If you want to cut back on wrapping paper etc tying a bow with cord round books or a bottle adds a festive touch, that can be re-used by the recipient too.
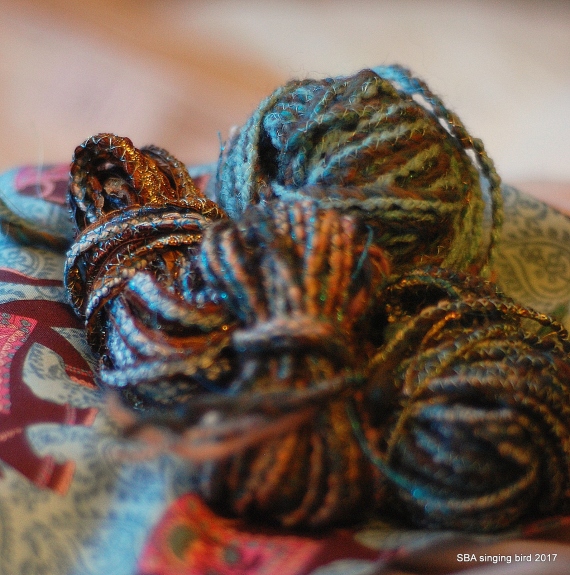
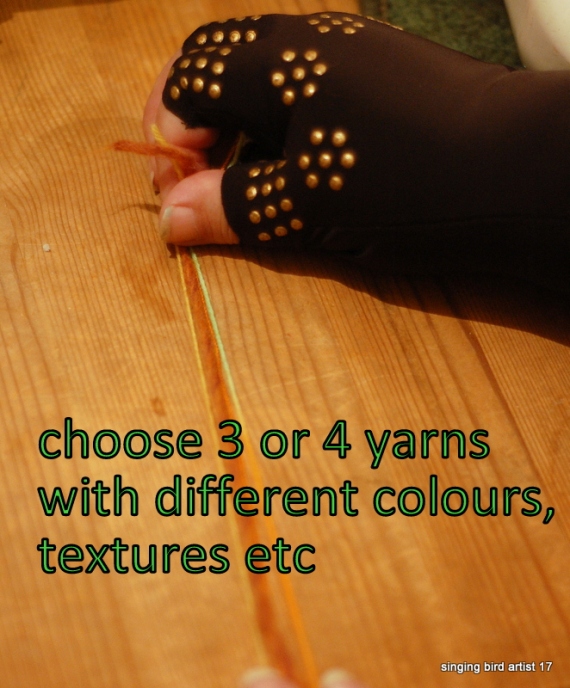
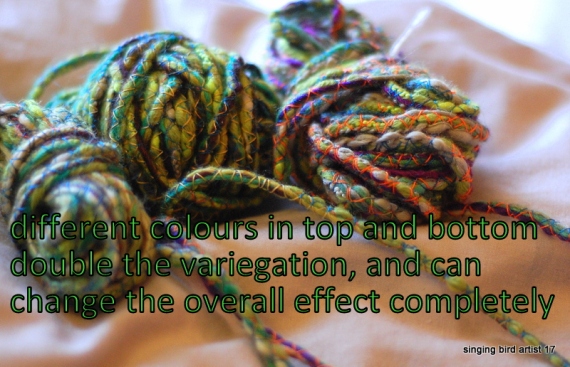
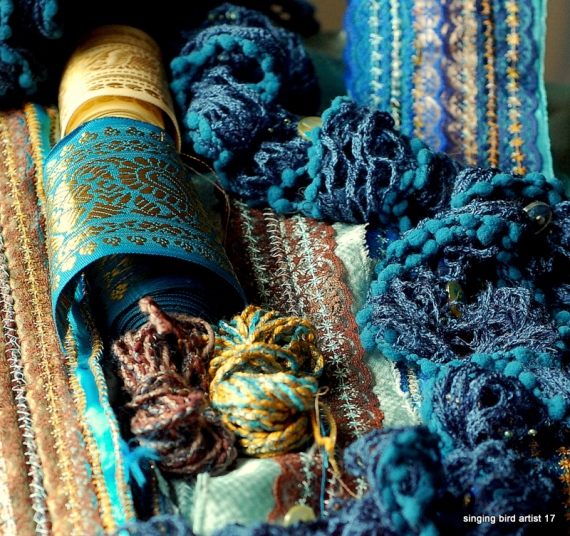
1.Choose your colours/textures to suit your end use, or just for fun, a piece may arise from a random choice 
2. Set your sewing machine to widest zigzag the foot will allow, and longest stitch your machine does.
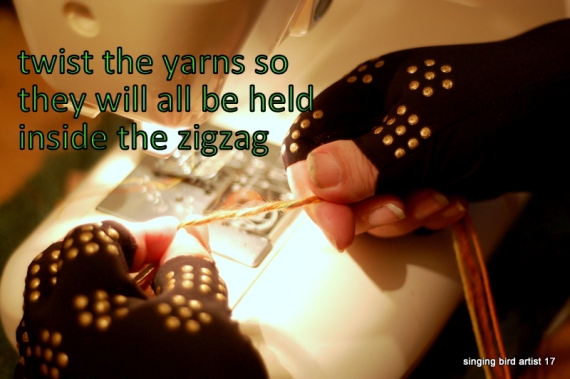
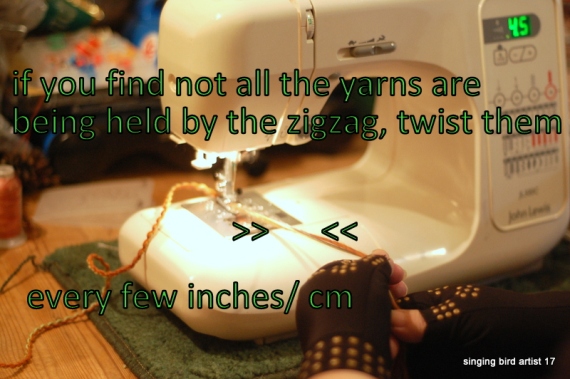
3. Hold the 4 or 5 yarns together loosely enough that there is some give, but firmly enough that you won’t drop them. Holding them too tightly is dangerous, because if you get a snarl up, you may strain the needle or worse, the machine timing.
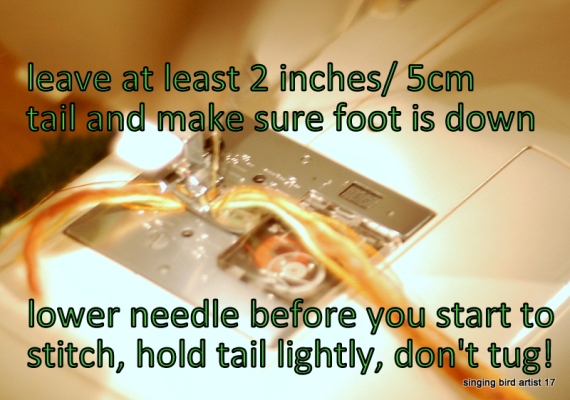
4. Hold the yarn ends with your left hand well behind the foot – do not tug! again, you might break a needle or the timing! – and your right hand between the machine and your lap, to keep the yarns smooth and tangle-free.
5. Put the foot and needle down and start the zigzag slowly. If you are used to piping this is ridiculously easy, but if you are a beginner, just take your own time until you are confident. I now have a sense of which spangle threads or eyelash yarns cause trouble and rattle along at top speed, but that’s taken a few years!
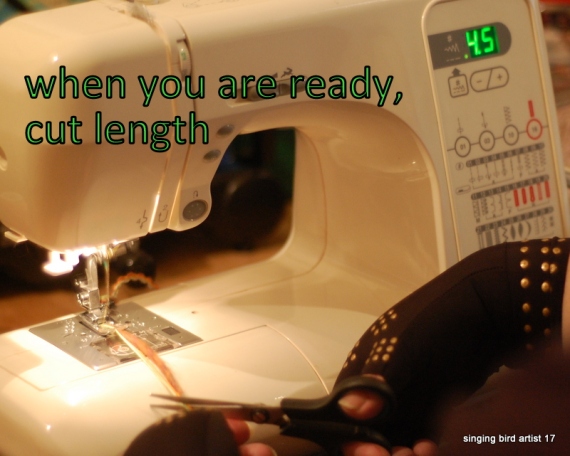
6. I normally make at least 3 metres of any cord, but it obviously depends on what you are using up, or your end goal. Cut the yarn before it goes through, and reverse it under the foot.
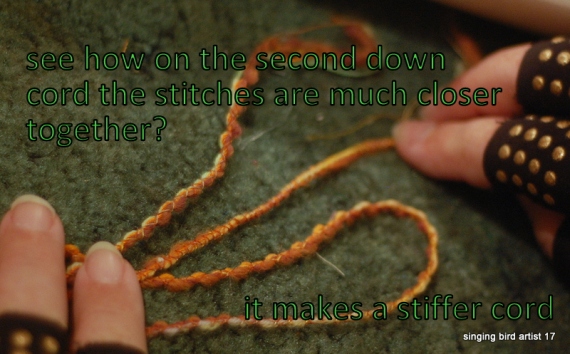
7. How stiff do you want the cord? If you want to crochet with it, or bend it at all [think bows] then reduce the stitch width by 1-2mm and the length by 2/3 maximum. If you want it super stiff, then you can either stitch at 1.5mm or several times in different colours until you have the effect you want. If you want it looser, or you’re in a hurry, then reduce by 1/3rd of the maximum stitch length.
8. Hopefully you now have a beautiful length of cord and are thinking, wow that was easy! It takes a lot more explaining than it should – as long as you hold the yarn in position and it doesn’t tangle, it is very very easy, so please don’t be put off that I’ve made 7 stages!


I was taught this technique on an Advanced Machine Embroidery City and Guilds and used the cords as part of my final piece, and in lots of art and craft work since. I particularly enjoy making heavily embellished fabrics, with ribbons, cords and laces stitched down with variegated threads. I’ve used it on book covers, bag handles, jewellery and gallery work. In Threads of Empire, my piece Tangled Freedoms used machine cords and sari ribbons stitched with variegated silks to represent rivers, the huge distances people travelled as part of the East India Company, the struggle for communication and the tugs on loyalty… people didn’t necessarily understand all that, but they commented on the shimmering cords and the connections they made
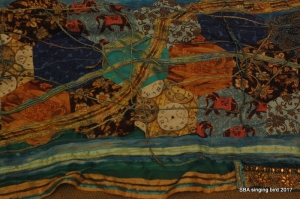
[detail 60cm x 1m of piece 60 x 360cm Tangled Freedoms 3 made for Threads of Empire exhibition, Nottingham Lakeside Arts Centre, 2017]